© 2016 by Steve Schwartz
One of the great features of the new, inexpensive Kindle Fire is your ability to expand its storage by adding an inexpensive SD (storage device) memory card. Rather than limiting yourself to the meager free space in internal storage (the 8 GB of built-in memory), you’re free to pack an SD card with massive amounts of music, videos, and photos. In addition to media that you’ve purchased from the Amazon Appstore, you can freely copy music, videos, and photos from your computer onto the SD card and play or view them on your Kindle Fire.
To that end, I bought a high-speed (Class 10) 64 GB memory card and filled it with videos (44 GB), music files (9 GB), and photos. Most of the music was imported from my CD collection into iTunes libraries on my Mac and PC. Initially, everything worked great and my entire CD collection was available to me on the tablet. However, after restarting my Fire a day or so later, I discovered that all the music on the SD card had vanished! This happened not once but five times in the first eight days.
To ensure that the music files were indeed gone, I connected the Fire to my computer and examined the Music folder that I’d created on the SD card. Sure enough, although all the folders nested within the Music folder (groups/artists and their albums) were intact, all the music files had been deleted. So I dutifully copied my 4,000+ songs to the SD card again, rebuilding the previous folder structure.
When my music files disappeared a second time, I swapped the new 64 GB card for an older 8 GB card (also Class 10) and copied a smaller subset of my music to that card—with the same result. Finally, I contacted Fire support and convinced them that my Fire might be defective and they should send a replacement. (Admittedly, I knew this was a long shot. If this particular Fire wasn’t able to interact properly with the SD card, it wouldn’t have selectively deleted only music files, while leaving empty folders and other types of media intact.)
For several days, the music files on the replacement Fire remained untouched. One morning, however, I launched the built-in Amazon Music app, saw the message 'Synchronizing Library,' and found that my music had again been deleted. In addition to the music on the SD card, a test album that I’d copied to Internal memory also vanished.
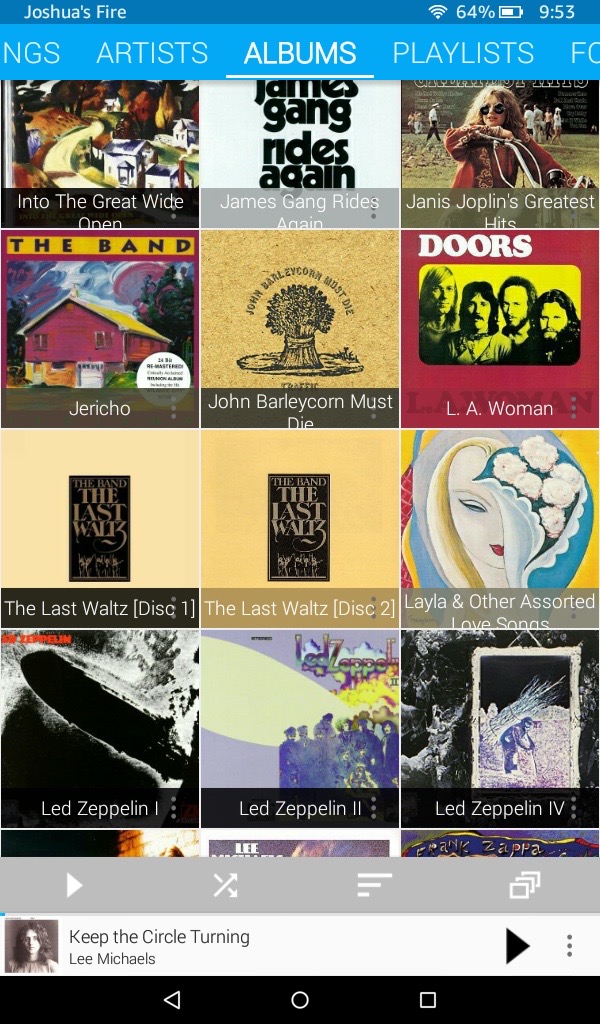
Amidst the repeated deletions, I discovered a workaround that seems to avoid this problem. It does, however, require that you use Rocket Player—a different (but free) music player app—and that you add a special Android .nomedia file to the top level of the folder(s) in which you’re storing your music. When the Fire gets around to synching or rescanning for media, other music player apps—including the built-in Amazon Music—may not be able to see your music files and, hence, won’t be able to play them. But Rocket Player (shown at the top of this page) will continue to rock on.
Phase I: Adding the .nomedia File(s)
What is a .nomedia file, and what its purpose? A .nomedia file is a blank (empty/0k) file named .nomedia; that’s all there is to it. Whenever a scan for newly added or deleted media (such as music, videos, or pictures) occurs and a .nomedia file is found, the folder that contains the file and any subfolders nested within it are skipped. A .nomedia file can frequently be found in some Fire/Android operating system folders and is placed there to avoid wasting time unnecessarily scanning these folders for media.
Regardless of whether the operating system, a library sync, or an app (such as Amazon Music) is responsible for the music file deletions, one or more properly placed .nomedia files should prevent this. In theory, if the operating system, Cloud, and/or offending apps don't know that your Music folder actually contains music files, the files should be left untouched.
SIDEBAR: What You Need to Know About Media Organization
Android doesn’t care how you organize your files or what you name the folders. When copying music files from your computer to the SD card, for example, you can create a single folder named Music, Songs, or Transfers from My Computer, and—within that folder—duplicate the manner in which the files are organized by iTunes, Windows Media Center, or whatever program you use to play music on your PC or Mac. iTunes, for instance, has a single main folder and within that folder—in tree-like fashion—creates separate folders for each artist and group. Within each artist/group folder are individual folders for that artist’s albums.
You may prefer to organize your music differently—by genre, for instance. Or if you don’t care about organization, you can drag-copy individual songs or entire albums onto the SD card and/or internal memory. Android doesn’t care whether you have nicely organized media or you have it scattered hither and yon. Unlike using a computer, you don’t even have to know where your songs are stored in order to play them. It’s the responsibility of your music app(s) to keep track of where each song resides. In fact, that’s the way all Android apps work that interact with files. Each such app is designed to read one or more document types (such as certain music file types, videos, Office documents, or PDFs) and to scan the device periodically to update the relevant file index by noting newly added files, as well as ones that have been deleted or moved.
For the technique described in this article to work properly, however, do not co-mingle your music files with other media types, such as photos or videos. The presence of a .nomedia file in a folder affects all files in that folder and its subfolders. Non-music media files in those folders and subfolders may fail to be recognized by the apps that you normally use to view or play them.

The simplest solution is to organize your music files within a single main folder on your SD card, rearranging previously copied music as needed. For example, you can create a music folder (named whatever you like) and then move or copy all of your songs into it. For music stored in internal memory, you can use the built-in Music folder. In this example, you’d need only two .nomedia files: one for the main music folder on the SD card and a second for the Music folder in internal memory. Otherwise, if you’ve already created folders for each album or group that are not organized within a single music folder, you’ll need to place a .nomedia file in every one of these folders to achieve the same effect.
Placing the .nomedia File(s)
When placing .nomedia files on your SD card and/or internal memory, you’ll need to do one the following:
- If all music is contained within a single folder—regardless of how many folders are nested within it (as described in the sidebar above), a single .nomedia file in the main, topmost folder will suffice.
- If you have multiple music folders that aren’t nested within one another, you must place a .nomedia file within each separate main folder that you want to affect.
To add the necessary .nomedia file(s) to your SD card and/or Internal memory, do the following:
1. Using the provided USB cable, connect the Fire to your or a friend’s Windows computer.
Note: Although Android File Transfer is useful for dragging songs from your Mac to the Fire, it won’t allow you to reorganize them or copy the .nomedia file to the Desktop or into a different folder. Both actions are simple to do in Windows.
2. An AutoPlay dialog may appear. If so, click “Open device to view files.”
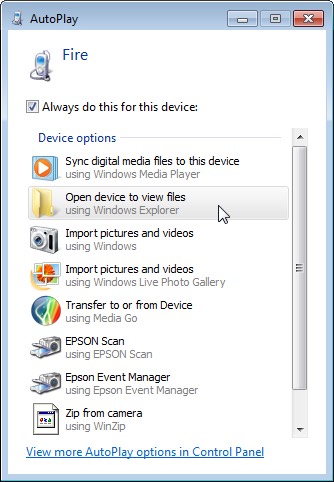
AutoPlay dialog box (Windows)
Note: If the AutoPlay dialog box doesn’t appear, open any Windows folder. Fire should be listed in the left-hand panel as a connected device.
3. Click Internal storage to view folders in the Fire’s built-in memory. Within Internal storage, open the Android folder, followed by the Data folder. Scroll as necessary to locate the .nomedia file.
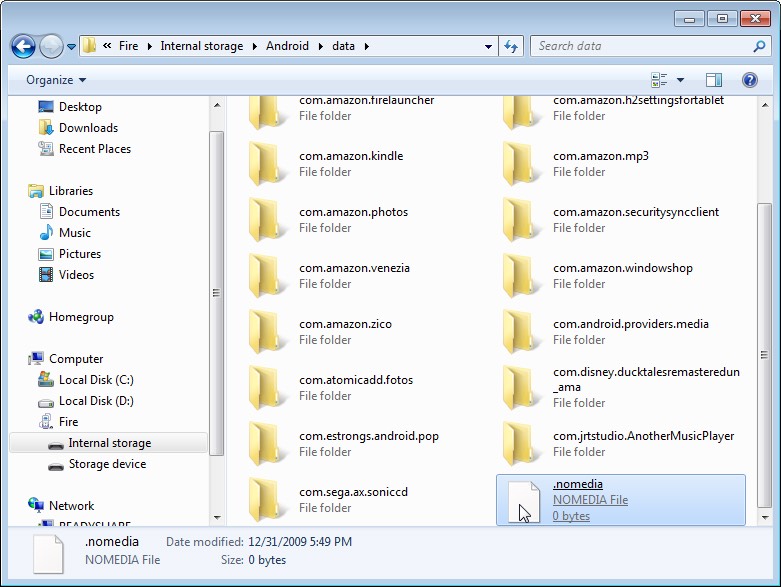
Find the .nomedia file in the Internal storage\Android\data folder
4. Make a copy of the .nomedia file by dragging it onto the Windows Desktop.
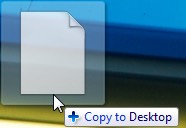
Drag the .nomedia file onto the Desktop
5. Select Storage device in the left-hand panel, open the Music folder (or whatever you named it) on your SD card, and then drag the copy of the .nomedia file from the Desktop into the folder.
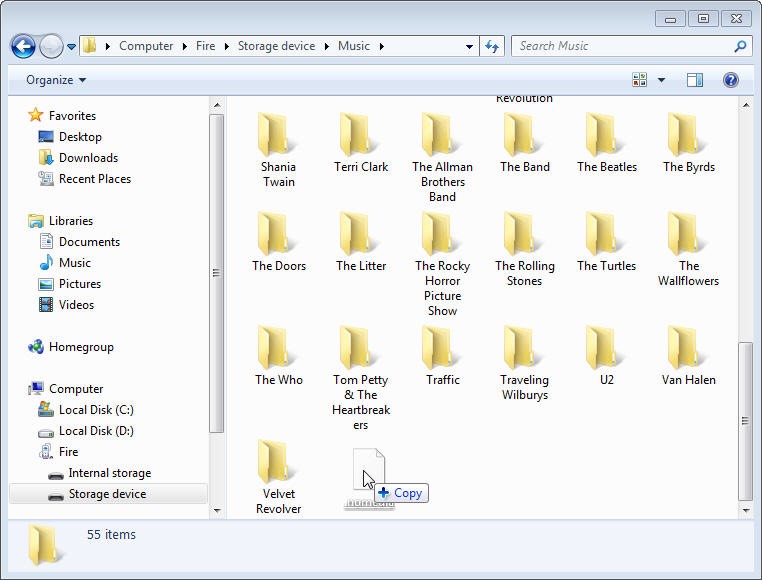
Drag the copy of the .nomedia file into your main music folder on the SD card
6. Drag a copy of the .nomedia file into every additional top-level folder on the Fire that you want to protect from a rescan or sync, such as the built-in Music folder in Internal storage.
Phase II: Installing and Configuring Rocket Player
Download and install Rocket Player – Music Player from the Amazon Appstore. To ensure that you select the particular version that’s designed for the Kindle Fire, it may be easier if you use your computer’s browser. Visit this direct link.
To configure Rocket Player, follow these steps:
1. Launch the Rocket Player app.
2. At the bottom of the main screen, tap the menu icon (the stack of three dots) and choose Settings.
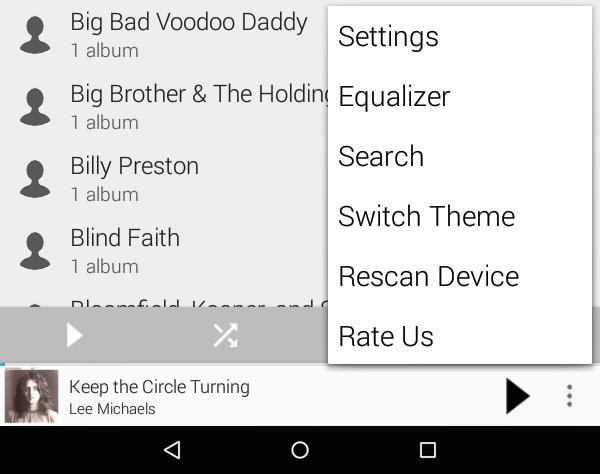
Choose Settings from the menu at the bottom of the main screen
3. On the Settings screen, tap My Library.
Tap My Library to reach the next Settings screen
4. Ensure that the option to "Ignore .NOMEDIA File" is checked.

Ensure that this check box is checked
Note: If Rocket Player ever fails to display your songs or if you’ve made changes to the stored music that it doesn’t recognize (by manually deleting or adding songs, for instance), you can force Rocket Player to perform a rescan by opening the same menu and choosing Rescan Device.
Tips
- Just because Rocket Player, Amazon Music, or some other app is unable to display its media, you shouldn't automatically assume that your music has been deleted. Connect the Fire to your computer and check its contents.
- Back up your Fire media to one of your computer’s hard drives. If you've painstakingly copied only selected music, photos, or videos to the Fire, it will be easier to restore them from the backup than to repeat the file-selection process.
- At some point, Amazon or Google may correct this issue, making it unnecessary (and possibly inadvisable) to leave the manually added .nomedia files in place. To test for this, find two albums that aren’t currently on the Fire and copy one to the root (top level) of Internal storage and the other to the root of the SD card. Do not put a .nomedia file in their folders; leave them unprotected. If a reasonable time passes since the previous music deletion—say, over a month—and the music in those two albums is still visible and playable from the Amazon Music app, it may be safe to remove your manually placed .nomedia files.
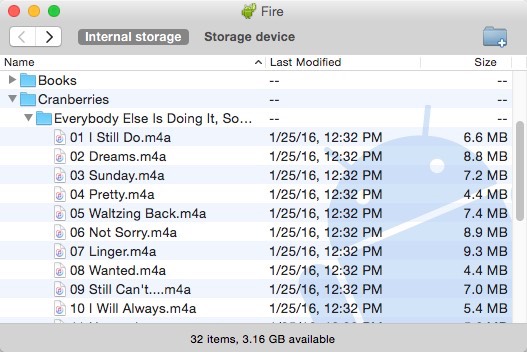
A test album (by The Cranberries) added to the root of Internal storage
- If one of your media viewer/player apps becomes unable able to see its media (even though it hasn’t been deleted), you can force the app to rebuild its file index. Open Settings and then tap Apps & Games, Manage All Applications. Select the problematic app from the scrolling list and then tap the Clear Cache and Clear Data buttons. The next time you launch the app, it should rescan for media. (Note that Clear Data may also cause the app to lose any settings you’ve established for it, so you’ll have to recreate them. You might want to make note of these settings before tapping Clear Data.)
Clear the cache and data for the problematic app
Summary
To prevent a library sync or rescan from deleting the music files on your Kindle Fire, start by adding an Android .nomedia file to all top-level folder(s) that contain your manually copied music (whether on an SD card or in internal memory). The presence of a .nomedia file in a folder instructs the Fire operating system and all apps to skip that folder and its subfolders during scans.
Next, install Rocket Player and enable its setting to “Ignore .NOMEDIA File.” This instructs Rocket Player to scan those normally excluded folders and find your music files—even when other players cannot. Although you can also use Amazon Music to play your music, there will probably come a time when the app will be unable to see the files—because of the addition of .nomedia file(s). Rocket Player, however, should always be able to find and play this stored music.